Create a Single Line Font in Silhouette Studio (Free Download)
28 May 26 (5mo ago)
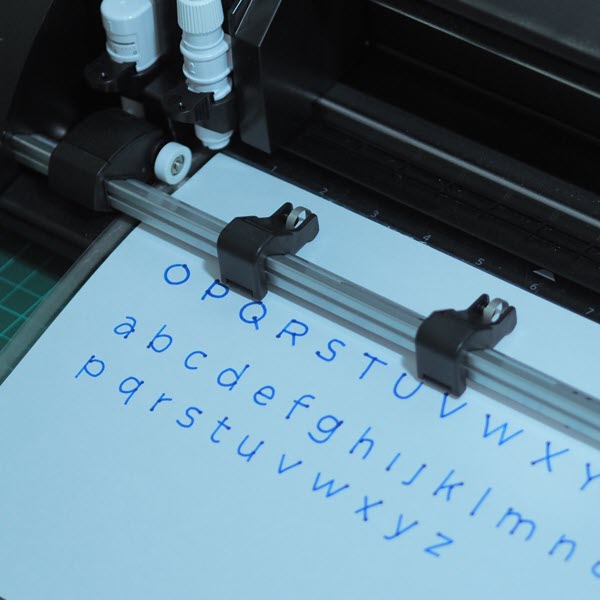
create-a-single-line-font-silhouette-studio-cameo.jpg
Just learned that you can actually create fonts inside Silhouette Studio.
Normally, I wouldn't bother making my own fonts—there are already a ton out there—but I specifically needed a "single-line font" for the Cameo 5’s sketch feature
In case you’re wondering what the fuss is about: a regular font is composed of closed shapes (outlines), so when you use the sketch feature, the machine traces the outside of every letter, giving you a double-lined, hollow effect. Even fonts labeled as "handwritten" are usually just standard closed-path fonts. To get that clean, pen-drawn look, you need a font made of single strokes.
These are highly specialized and honestly hard to find. Most font viewers will even make them look wonky or broken because they try to "close" the path, whereas single-line fonts are usually not paths.
You could just download or buy fonts specifically made for this, but learning that Silhouette Studio has its own built-in font creation (I know, right?) made me decide to just roll my own.
If you just want to test it out, you can check it here:
Now, onto the creation. There are several ways to make a font, but it basically comes down to two steps: 1) creating the font's line paths, and 2) building the actual font file.
Silhouette Studio already handles step #2. For step #1, you can draw the lines either directly inside Silhouette Studio or use any 2D vector app.
The most straightforward way is to use a pen tablet and draw each letter. I use Clip Studio Paint for this because, unlike other 2D apps where the pen tablet brush/write-over is only for pixels, Clip Studio Paint ALSO writes in vectors. It also has a great "adjust line" feature to smooth out the curves. The stroke width doesn't really matter in this case since we will be using the paths.
A quick tip: aim for the fewest number of strokes possible. For example, with the letter "E," you could use as many as 4 strokes (3 horizontal dashes and 1 vertical line). But you can also just do it in 2 strokes: one for the "L" shape and another for the top two horizontal lines.
The main reason for this is mechanical: for every single stroke, the tool holder has to lift itself up before writing the next one. Too many strokes will take forever. Plus, the machine slightly pauses at the end of every stroke, creating a tiny ink blot—much like what happens when you hold a physical marker down in one spot for too long. Fewer strokes mean fewer of these mechanical marks on your project.
After drawing, even if you used a digital pen, you might still need to clean up and smooth out the paths. It is always better to represent a curve with a smooth Bezier line rather than a bunch of segmented straight lines.
For instance, a letter "C" only needs about 2 to 3 Bezier points to look perfectly smooth. If you try to create that same curve using short, straight lines, you might need 12 to 20 points to make it look decent. At small sizes, you might not notice, but if you sketch the font at a larger scale, those jagged, segmented edges will definitely show up.
Also, it goes without saying that the font paths don't need a fill, closed boundaries, or any stroke weight. When you are sketching with a cutting machine, the actual thickness of the line is entirely determined by the physical pen you put in the tool holder—whether that's a thick marker or a fine ballpoint pen.
Have fun creating!
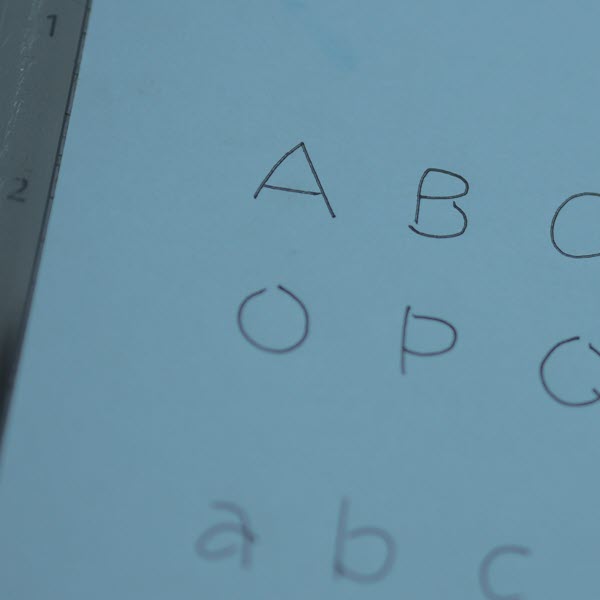
P.S. Another workflow I used. Convoluted but uses a 3D Software. It's really just the Houdini doing the work and Blender and C4D is just for Input/Ouput Processing.
- Export the SVG
- Import from SVG to Blender.
- Export as Alembic.
- Import the Alembic to Houdini to perform point smoothing.
- Export to FBX.
- Import the FBX to C4D, then export as a DXF.
Finally, use that DXF (already a vector) to create your own font.